Implementation Guide
The following 3 step implementation guide is intended to provide users with a general overview of what it takes to get Ajax Load More running at the most basic level.
#1: Create Repeater Template
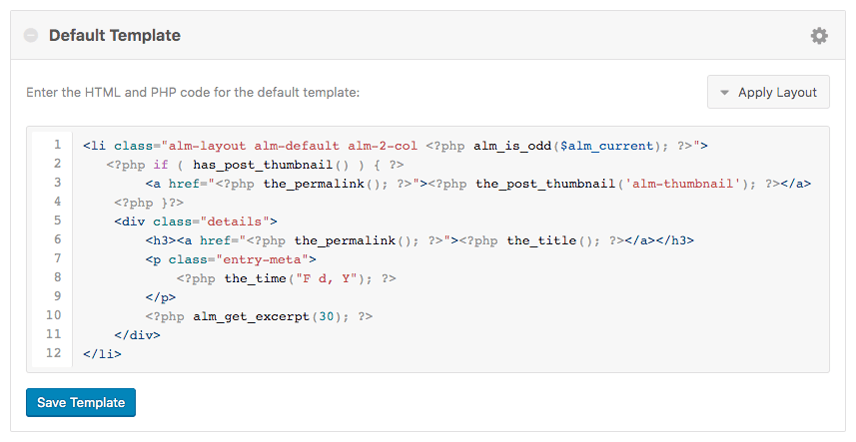
Ajax Load More uses a templating system referred to as Repeater Templates to manage the front-end display and styling of the Ajax-loaded content.
Repeater Templates are a way to match the look and feel of the Ajax Load More generated content to your website.

The image above represents the code that will be rendered for each item returned in the Ajax Load More loop. Templates will typically consist of a combination of HTML, PHP, and core WordPress functions such as the_title().
To edit and customize your Repeater Template, visit Ajax Load More > Repeater Templates inside the WordPress admin.
When you’ve created a template (or left the default template as is) you can move on to the next step.
#2: Build a Query/Shortcode
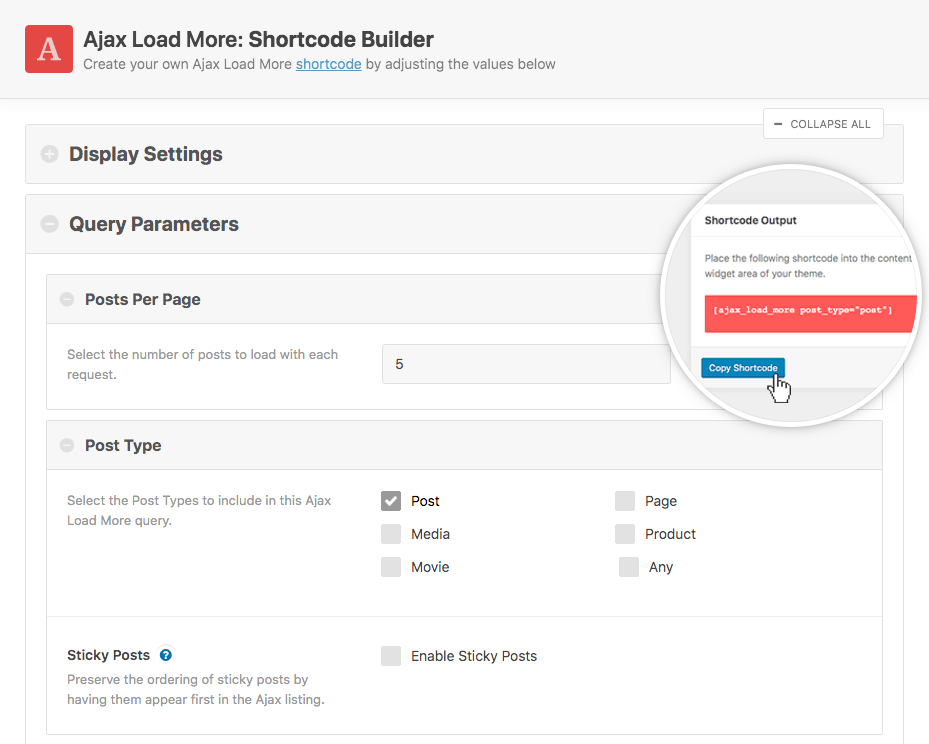
The second step is to create a custom [ajax_load_more] shortcode using the Shortcode Builder or build it yourself using the available parameters – this step is crucial in the process as this is what instructs Ajax Load More on the content to display via infinite scroll.
The shortcode builder allows you to create complex queries based on your website content and define display options such as button labels and transitions with only a few clicks.

To build your own shortcode, visit Ajax Load More > Shortcode Builder inside the WordPress admin.
Once you’ve selected all the parameters and built up a custom shortcode, you can copy the generated shortcode from the sidebar and move on to the next step.
#3: Insert Ajax Load More
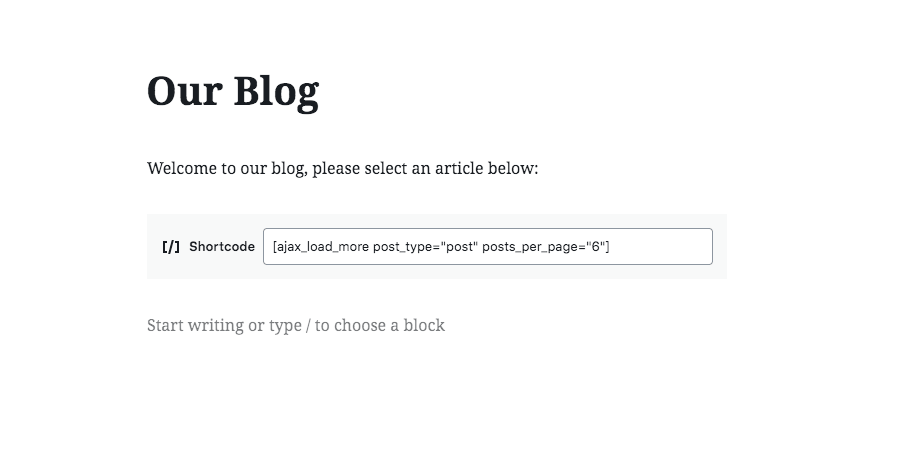
The final step is to add Ajax Load More to a page or page template in the location where infinite scroll should be displayed.
To do this, you can paste the [ajax_load_more] shortcode directly into the content editor or in a template file within your theme using the do_shortcode() method.

And that’s all there is to it, once the shortcode has been added and the page has been saved you can go ahead and view the results.
If you have any questions about the guide or you’re having issues with the setup, please don’t hesitate to contact support for help.