Cache
Improve website performance by caching the results of Ajax server requests
The Cache add-on generates static files for Ajax Load More requests and serves them directly, eliminating the need to query the WordPress database.

Implementing caching can improve overall site performance and substantially decrease load times, resulting in a faster and more responsive experience for visitors.
Features
Some key features of the Cache add-on for Ajax Load More.
Boost Performance
Reduce stress and load on your server by minimizing database queries and serving static cached files.
Auto-Generation
The Ajax Load More cache can be auto-generated on the server by using the alm_cache_array filter.
Administration
Take control of your Ajax Load More cached content with the intuitive cache management and administration dashboard.
Improved Load Times
Reducing page load times has been proven to increase your visitors time on site and overall number page views.
Add-on Details
Learn more about the Cache add-on.
How It Works
The Cache add-on saves the results of each Ajax Load More query as static JSON files in the WordPress uploads directory. Once generated, these static files are served to visitors instead of triggering additional Ajax requests to the WordPress database.
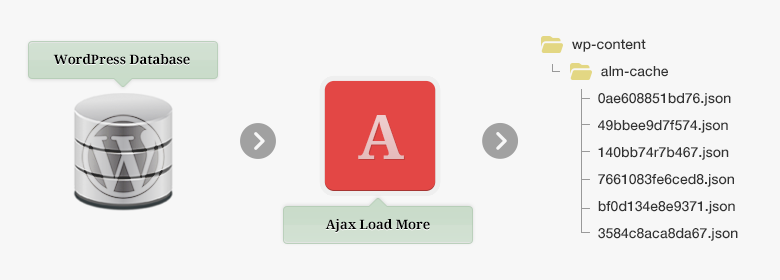
The cache is generated dynamically the first time a user triggers an Ajax Load More query. This process runs transparently in the background, so users will not notice that cache files are being created.
Subsequent visitors are served the static content, and Ajax Load More bypasses the database entirely until the cache is cleared.
This approach provides several key benefits:
- Improved Performance: Serving static files reduces server load and significantly decreases page load times, particularly on high-traffic sites.
- Scalability: Because cached content is served without hitting the database, your site can handle more simultaneous visitors without performance degradation.
- Seamless User Experience: Cache generation happens in the background during a user’s first visit, so subsequent visitors experience near-instant content delivery.
- Flexible Management: Administrators can control cache creation, update, and clearing through the Ajax Load More Cache dashboard or programmatically via hooks.
Parameters
Caching can be enabled for any Ajax Load More instance by simply adding the cache="true" parameter.
| cache | Enable the Ajax Load More cache for this query. (true/false). |
|---|
Example Shortcode[ajax_load_more cache="true" posts_per_page="4" scroll="false"]
Try it for yourself! Click the Load Posts from Cache button below and notice the speed at which the posts are loaded.
Cache Directory
By default, the Ajax Load More Cache add-on stores and serves cached files from the WordPress uploads directory (/wp-content/uploads/alm-cache/). You can customize this path using the alm_cache_path hook.
// functions.php
add_filter( 'alm_cache_path', function() {
	return get_stylesheet_directory() . '/cache/';
} );The alm_cache_path filter can be used to update the absolute server path of the Ajax Load More Cache. This path is used when writing and saving files to the server.
Auto-Generation
The Ajax Load More Cache can be auto-generated by defining the alm_cache_array filter in your site’s backend. Auto-generating the cache allows administrators to prebuild all Ajax request responses, improving performance for end users and streamlining development workflows.
During the build process, administrators can monitor the progress and status of each cache instance directly from the Ajax Load More Cache dashboard.
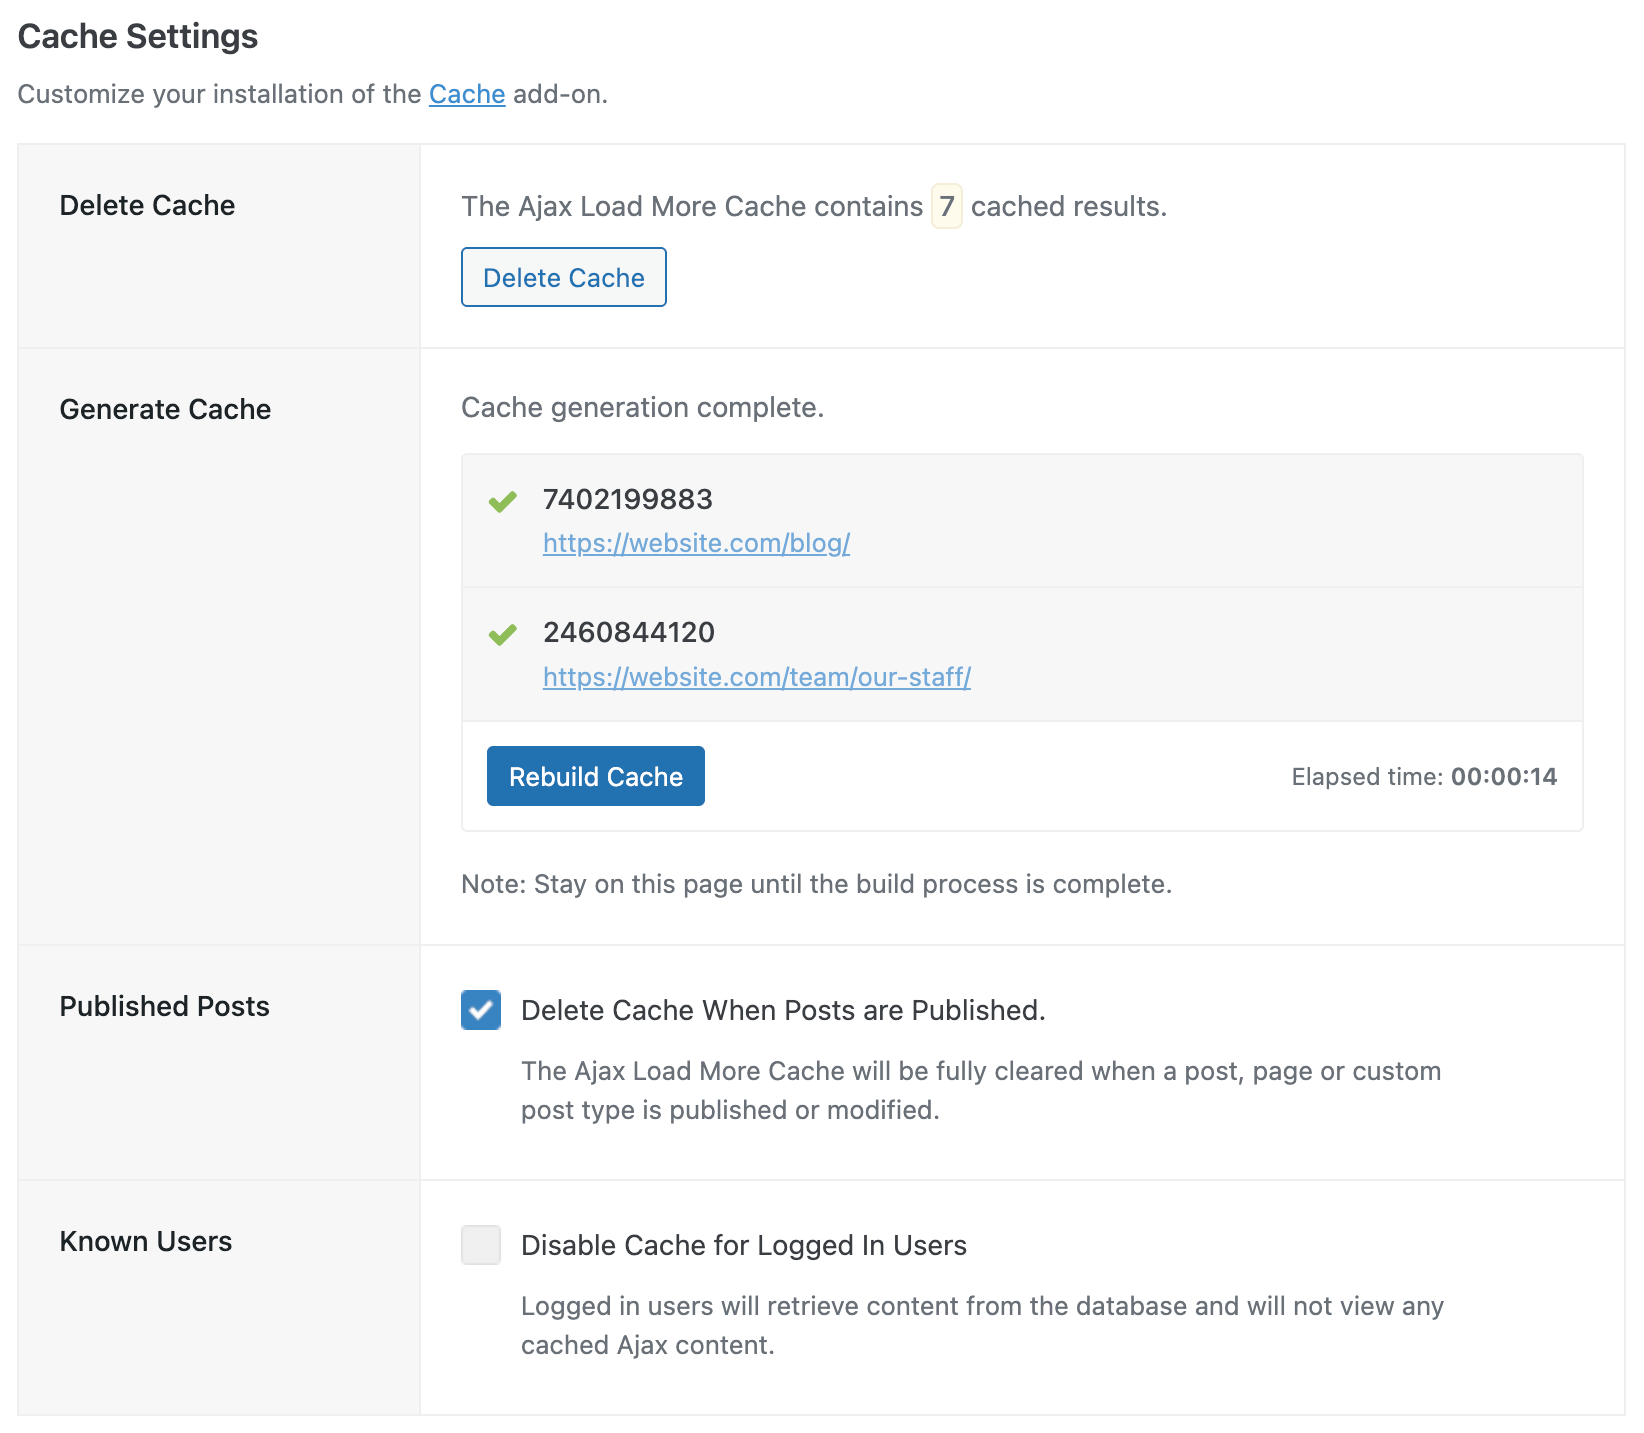
Cache Settings
The Cache add-on has global settings available on the main Ajax Load More settings screen that can help automate the cache process.
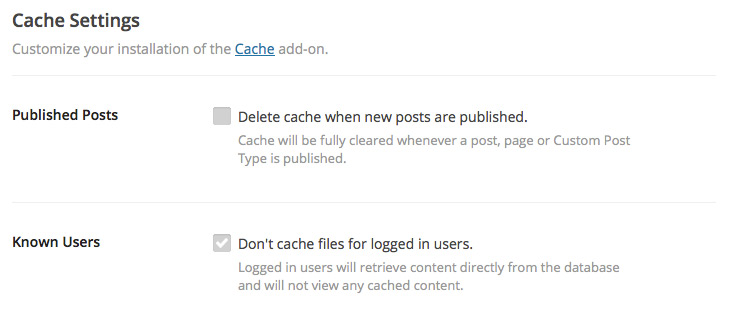
Published Posts: Checking this box will flush the cache every time a page, post or custom post type is published or updated. This will ensure your visitors are always seeing the latest content.
Known Users: Checking this box will turn off caching for all logged in users – from subscribers all the way up to site administrators.
Installation
Upon purchase of this add-on you will receive a confirmation/purchase receipt email. Your receipt will contain a direct link for downloading your copy of Ajax Load More: Cache and a license key.
After downloading the add-on, upload the unzipped files to your /wp-content/plugins/ directory or visit your plugins dashboard and upload the downloaded .zip under Add New.
License Activation
To activate your add-on and receive updates directly in your WordPress plugins dashboard users are required to enter the license key that was included with their purchase receipt.
To activate a license key:
- Visit the Licenses section within the Ajax Load More plugin.
- Enter the product key and click Activate License.
- If the status indicator turns green your add-on has been successfully activated (example below).
If you did not receive a confirmation email containing your license key, please check your spam/junk folder. If you still cannot locate the email, contact me at darren [at] connekthq.com or use the Product Support form.